 To my excitement (and humbling surprise), I was given free rein to design a creative art installation for our trade show booth. The initial idea was to adapt one of our floral note card designs into a 3-dimensional piece made entirely out of paper. In the end I needed to build three pieces: one would go on the front of our counter and the other two would be mounted on the short wall extensions (called returns in trade show booth speak). I borrowed inspiration and know-how from Anthropology windows, restaurant signage, and Deb's to-scale architectural renderings. For the end concept, I envisioned multiple layers of floral and botanical shapes within shadow-box-like frames.
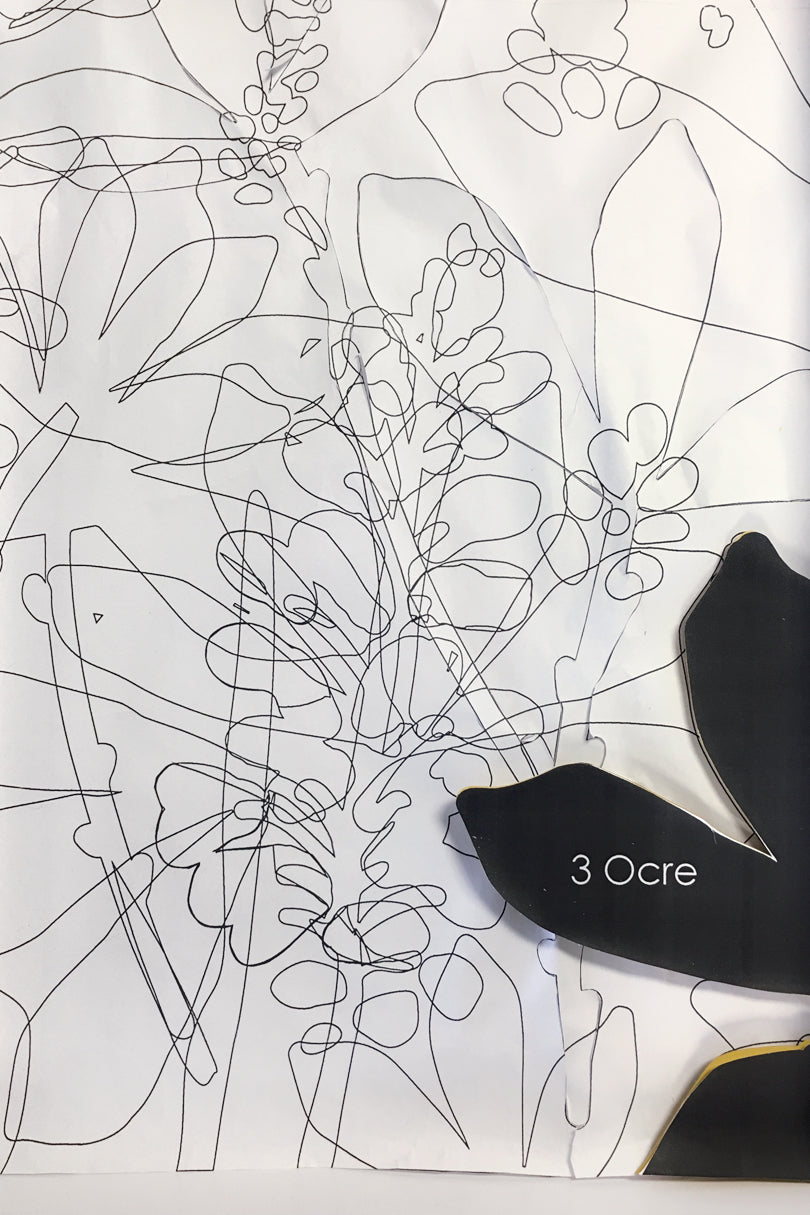
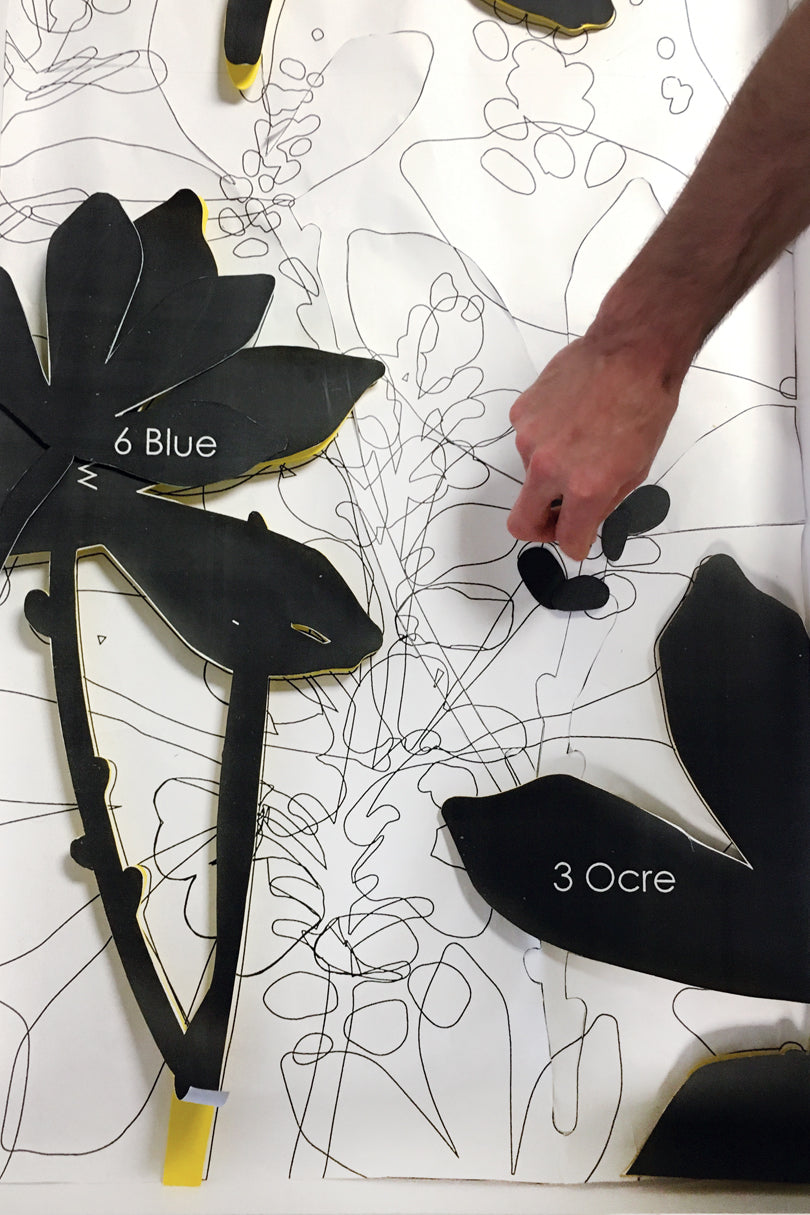
To start, I made digital compositions of all of the artwork’s shapes in Adobe Illustrator. Luckily, Illustrator has this handy window called "layers" which really helped to organize the process. I was able to place each of the shapes in various layers that coincided with where they would be placed in the installation frames. The shapes were labeled according to frame, paper color, and intended layer. Because I just had our office printer, I scaled everything down to print on legal sized paper. Then it was off to good 'ole FedEx Office and Print for a couple hours of oversized Xerox copying (scaled up 500% to be exact).
These black and white copies would be applied to paper and then serve as our stencils. But first, we found large cover sheets to match the design’s color palette and laminated them together with spray mount. Armed with Easy-Tack (what I aptly refer to as miracle stencil glue), we then applied rough sections of the oversized copies onto the nice and sturdy double-thick sheets. From there, it was time to cut out each of the shapes using the stencil as our guide. Basically, this required several days of intense X-Acto cutting time. If only Sabrina and I had known about the ergonomic Kiwi X-Acto blade holder before this project ensued.
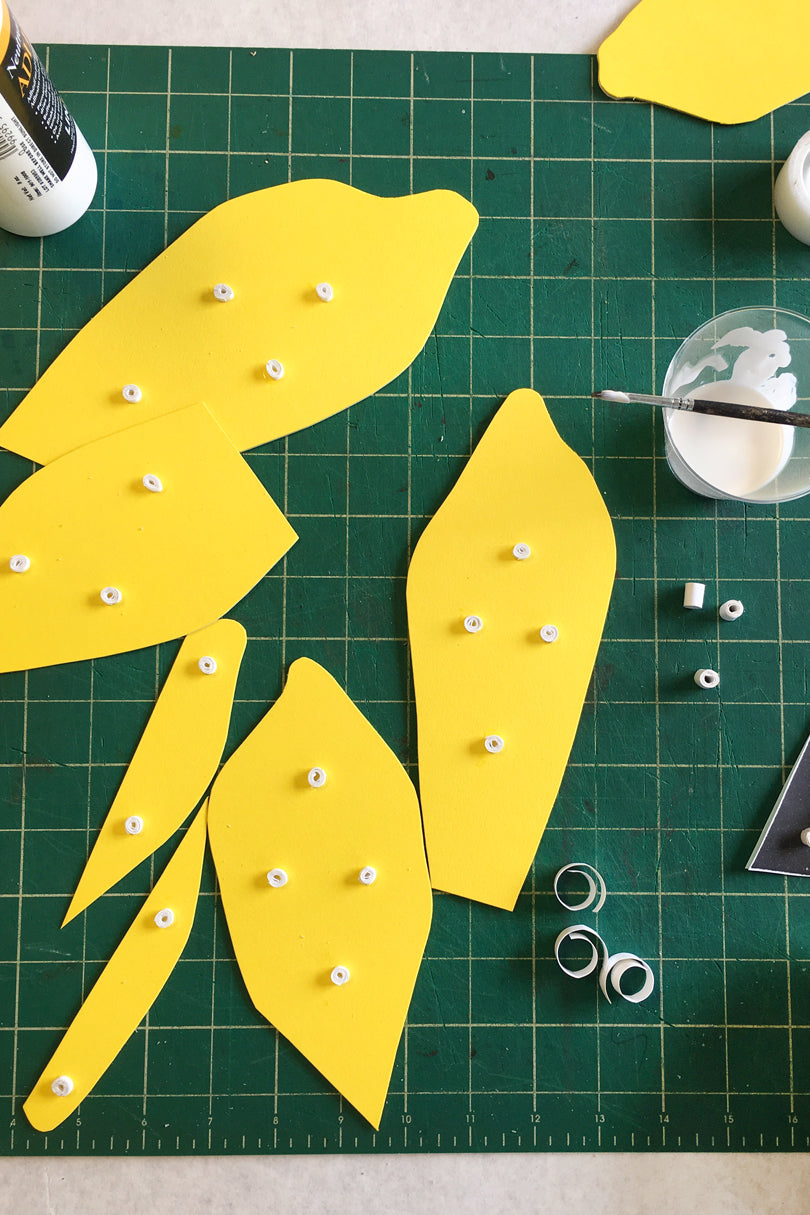
After tending to our callused hands, we were ready to move onto the next stage. We needed spacers to create the depth between all of the shapes we had just cut out. So how does one make spacers? Using the leftover paper, we cut a wide array of colors and widths with the handy shop guillotine in 1/8" increments and then rolled the strips of paper into cylinders with PVC glue. This maaaaayyyy have been just as time consuming (if not more) as the X-Acto-ing—Can that be a verb? Well, it is now.
We glued the hand-rolled spacers onto the backs of every shape, being very careful to select the appropriate spacer according to each shape’s assigned layer. For example, the first layer of shapes received 1/8" spacers. Shapes on the second layer received 1/4" spacers and so on and so forth. And sooooo on and sooooo forth, for a very long time until all of the spacers had been applied to the backs of each of the cut-out shapes.
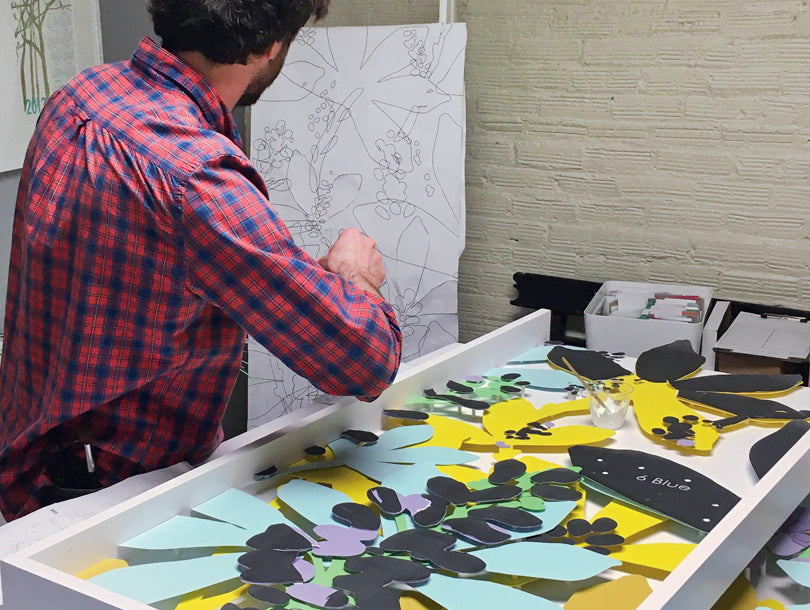
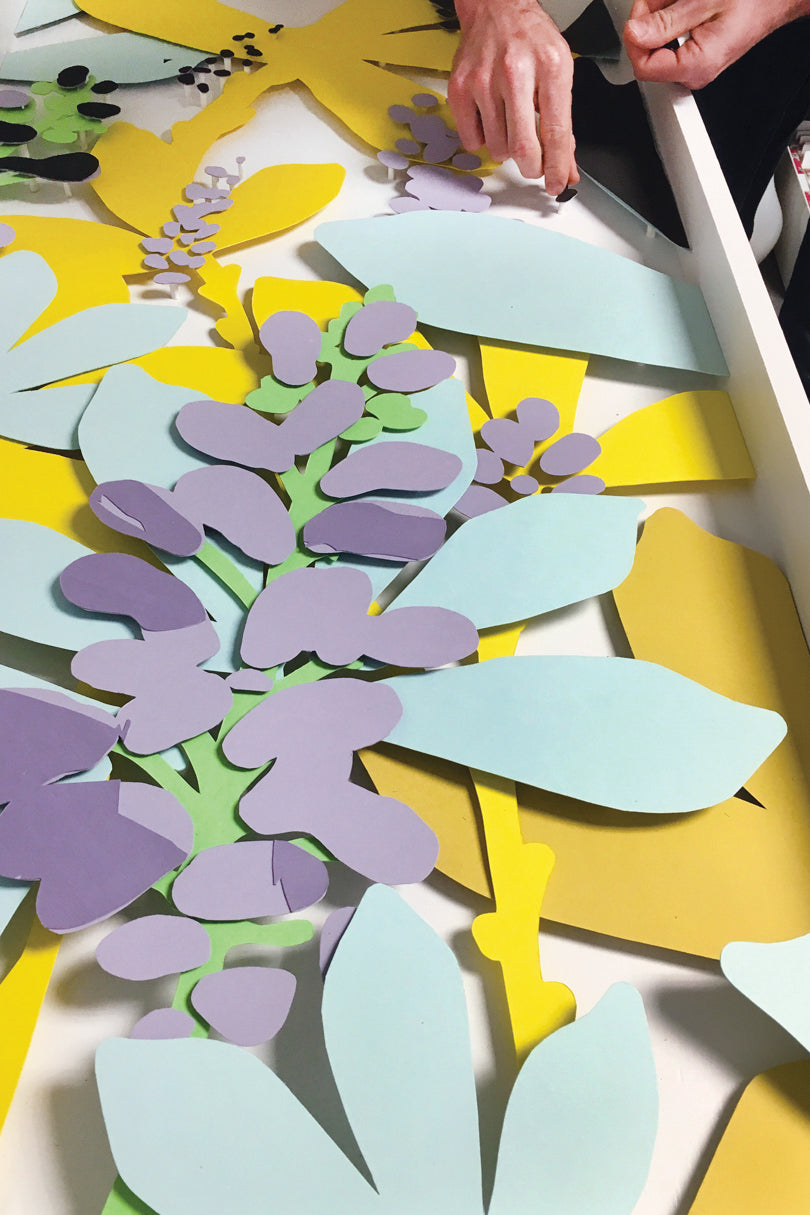
 Finally, we began to assemble the cut-out floral and botanical shapes within the frame. I had outlines of the composition printed to-scale on large sheets of paper to serve as our “map.” I laid this down and temporarily placed the shapes in their respective places on top. Sabrina may add that this led to many head scratching moments as she tried to follow this map that apparently only made sense to me. With everything in place, I removed the map, channeling the magician who rips a table cloth from underneath a table setting albeit a bit more gently. I then peeled off the stencil paper we had temporarily adhered with the aforementioned miracle Easy-Tack.
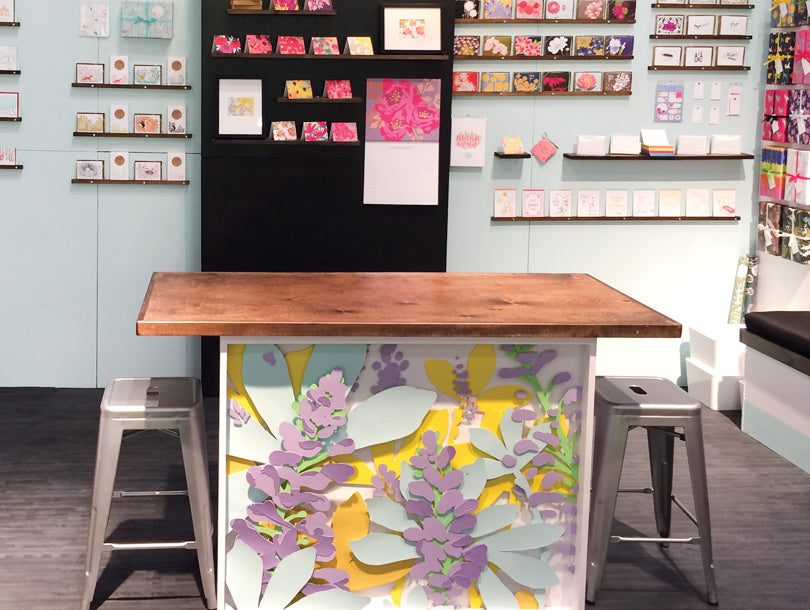
 And AT LAST, we were able to permanently glue all of the spacers and their adjoining shapes to the installation frame and their neighboring layers. To make sure nothing would come apart during transport, we boarded and shrink wrapped each of the frames and then shrink wrapped them again for extra measure. April, Eric, and Deb did an awesome job setting them up in the booth. I joined them later in the show, and I must say everything came together looking pretty darn spiffy. Had I known this would take a solid month and a half of work and leave us with temporarily arthritis-ized—again I realize not a word—hands? Nope. Would I ever take on another paper installation project? Absolutely.